Issues Tab
How to Search for Issues
You can use the issue search box to narrow down the list of issues shown.

The search box enables searching by various criteria:
- issue code, summary, description, resolution
- latest issue comment
- site name, site city or state
- site tag(s)
- company name
Search by Issue Code
If you wish to search for issue by #, then you have to include the complete issue ID. For example: RCE-2259

This is necessary because if we allowed partial matches in the Issue # field, then searching for "100" would bring up all issues that have "100" in the Issue # (or any of the other fields). So, RCE-100 would match, but so would RCE-1000 and RCE-1001 etc.
Searching for Closed Issues
Whether the search results contain closed issues or not is determined by the filter applied to the view. So, if you wish to find closed issues, then either set the filter to "Closed Issues" or "All Issues":

Issue Search and "Threaded View"
Note that previously another factor that could influence whether you find an issue or not is the "Threaded View" filter. When this is clicked, only the latest issue for each site is shown. So if you searched for RCE-2258 and "Threaded View" was on, then it wouldn't find it because there is a newer issue for Kauluwela already (RCE-2260). Because this can get confusing, we've modified the site to disable "Threaded View" when using the search box. So if you search for "Kauluwela" and have the filter set to "All Issues" then you should see all issues for "Kauluwela."
Filter + Search
In addition to issue code and site name, you can also use the search box to search for issues by summary, description, resolution, the latest issue comment, city, state, tag, or company name. So, for example, if you wish to see all open issues for all sites in Honolulu, you should set the "filter" to "Open Issues" and search for "Honolulu":

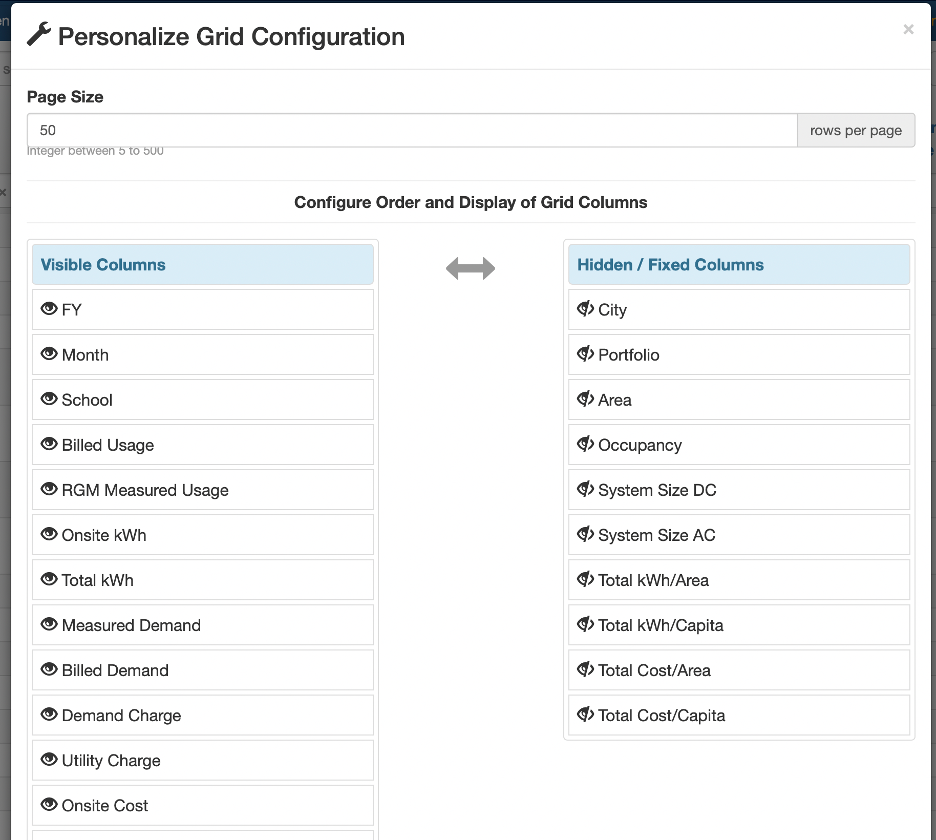
Configure Screen
Additionally, the wrench icon allows users to personalize the columns of the site page. Simply select the icon and use drag and drop to configure the most relevant categories. Users can also change the order that they're listed on the screen to group related ones.

Issue Workflows
Issue Workflows
An issue can follow one of two workflows:
- The "Default" workflow is quite simple and includes the following statuses:

- The "Servicing" workflow is better suited for issues that require a site visit or more involved troubleshooting:

Moving an Issue Between Workflows
An issue can be moved from one workflow to another both on the issue page or on the issues list page.
On the issues page, you can change the workflow using the "Change Workflow" function:


Bulk-moving Issues Between Workflows
If you need to move multiple issues at a time:
- Open the Issues List page
- If the "Workflow" column is not in your view, click on the wrench icon and, in the window that appears, drag it from the column list on the right to the column list on the left, and click save to add it to your view
- Then use the checkboxes on the right to select the issues you wish to move (or click on the top-right corner to select all issues in view)
- And finally use the "Change Workflow" button at the top of the screen to bulk move all selected issues to the new workflow.
Visual guide follows.
Adding "Workflow" column to your issues list view:


Selecting all issues:

Changing workflows:


Link Issues
Issues can be linked together by using the "Link to Issue" function available on the single issue page:

Select how the two issues are related:

as well as the related issue, and click "Link Issues":

Only issues that belong to the same client can be linked. Issues that are "closed" or deleted are not shown in the list of options.
Afterward the linked issue will be shown in the "Linked Issues" section, including the current status of the linked issue:

You can click on the issue to navigate to it.
The link is also displayed after opening the linked issue, thus it is easy to navigate between linked issues:

To break an issue link, click the little broken chain icon next to it:

Issues shown in the "Related Issues" section are not linked, they are just issues that have been created for the same site or system:

Sub-tasks
Sub-tasks can be created either by creating a sub-task for an existing issue, or converting an issue into a sub-task by selecting the parent issue.
Create a Sub-task
Use the "Create Subtask" link from the single issue page to create a sub-task for an issue:

The sub-task issue will initially be set to belong to the same site as the parent issue, but this can be changed if needed by editing the issue after it is created. The System, Issue Type, Issue Sub-Type, and Priority fields are copied from the parent issue, but can be changed before saving the new issue. It is also possible to add a comment to the new issue when it is created:

Navigation Between Issues and Sub-tasks
Sub-tasks that have been created for an issue can be seen on the issue page:

On a sub-task page, you can see and navigate to the parent issue at the top of the page:

Convert an Issue into a Sub-task
An existing issue can be converted into a sub-task by using the "Change Parent" function:

Select the parent task and click "Save":

Scheduling an Issue
An issue can be scheduled using the "Schedule Issue" function on the single issue page:

Set the deadline and click Schedule:

The issue deadline can be seen in the right column on the issue page:

Cloning an Issue
A copy of an issue can be created using the "Clone Issue" function:

Most issue properties are copied from the cloned issue:

After the issue is cloned, the newly created issue is automatically opened.